Third Party Software
All programs below are freeware programs, except as noted.
Stream Deck
A Stream Deck is a customizable control device sold by Elgato designed to streamline workflows for content creators, streamers, and other professionals. It features a grid of physical buttons, each of which has an LCD screen underneath. The screens can display custom icons and labels, and the buttons can be programmed to perform a wide variety of tasks. These buttons can be used with N1MM+ to simulate key presses, send commands to connected radios and automate keystroke sequences.
Key Features of Stream Deck:
- Customizable Buttons:
- Each button can launch applications, execute commands, or control software (e.g., starting/stopping streams, switching scenes, or adjusting audio in OBS Studio).
- You can assign multiple functions to a single button, including macros and multi-step actions.
- LCD Screens:
- The buttons have small, bright LCD screens that display custom images or icons, making it easy to identify their function.
- Profiles and Folders:
- You can set up different profiles for specific workflows or applications.
- Folders allow one button to access multiple submenus, expanding functionality.
- Stream Decks come in different models with varying numbers of buttons (e.g., Mini, Standard, XL) and knobs to suit different needs.
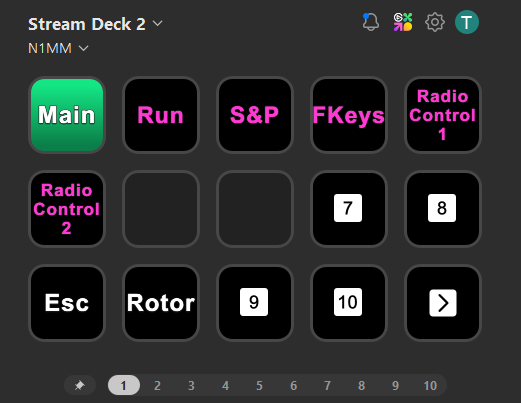
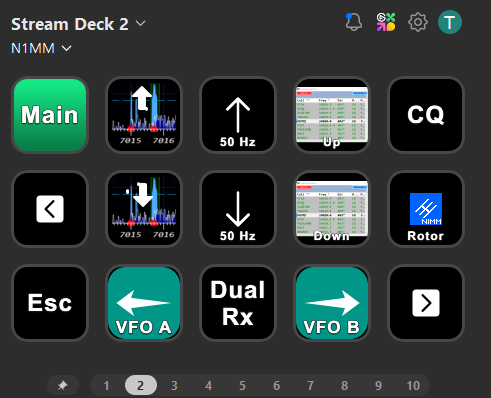
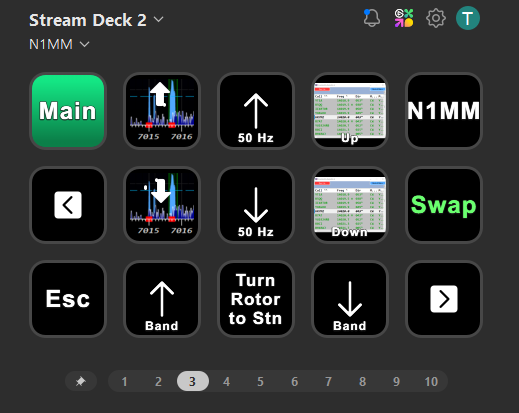
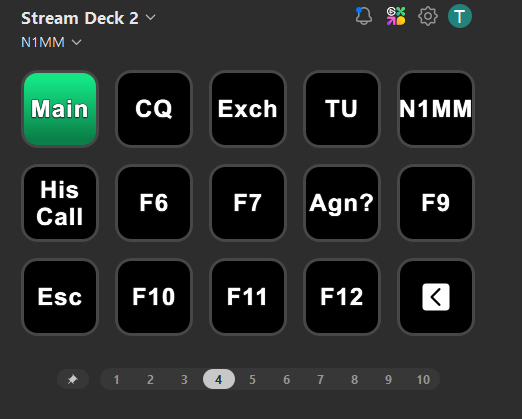
- In the samples below, I pinned “Main” across all pages to implement a two level menu structure where “Main” returns you to the first screen shown. You pin by right clicking on a button and choosing “Pin”
Sample Screens from a Stream Deck
Recommended plugins for Stream Deck and how to use them:
- Command Sender – with command sender you can send data directly to N1MM+ port 13064 via UDP. XML is used to format the command and Key Mapping functionality can be used to perform multiple keystrokes & macros for a Stream Deck button press. e.g.
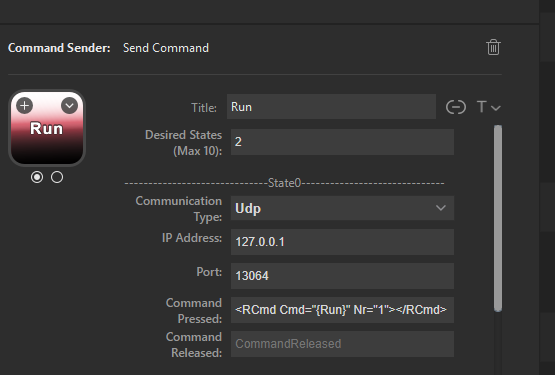
The ip address is usually set to 127.0.0.1 which is the address of the local machine. You can also set it to another ip address running N1MM+. In the case of a computer on your LAN, this would be something like 192.168.1.43 – this ip address can be found by running ipconfig in a cmd prompt on the target machine. You could also send it to a remote computer by opening a port on the remote router to allow 13064 UDP messages through, or by mapping another port to 13064. There is no security provided when you do this, so don’t leave it open all the time, or find a way to secure remote connections.
The command format is: <RCmd Cmd=”xxx” Nr=”n”></RCmd>
xxx is the payload for the command. It can be text to send in CW or digi, a macro (like in the screen shot above), or a string preceded by KeyMap that will be interpreted using the rules for N1MM+ Key Mapping.
n is the Entry Window number – 0, 1 or 2, that you want to process the command. 0 will send the command to the Entry Window that is in focus. If Nr is omitted, it will default to 0.
Using Command Sender is more complex than using an Stream Deck Hotkey, but does not require N1MM+ to be in focus. Many commands that you send to N1MM+ will bring N1MM+ into focus, saving you from needing to use multi-access hotkeys.
- Examples:
- <RCmd Cmd=”KeyMap N1MM” Nr=”1″></RCmd> Send the literal string “N1MM”
- <RCmd Cmd=”KeyMap F4″ Nr=”1″></RCmd> Press the F4 key sending its contents
- <RCmd Cmd=”{F4}” Nr=”1″></RCmd> Interpret the macro {F4} sending the F4 key contents
- <RCmd Cmd=”KeyMap Alt+J”></RCmd> Turn the rotor to the location of the call in the callsign textbox of the EW in focus
- <RCmd Cmd=”KeyMap Alt+W” Nr=”1″></RCmd> Wipe the callsign textbox via a keymap
- <RCmd Cmd=”{wipe}” Nr=”1″></RCmd> Wipe the callsign using a macro
- <RCmd Cmd=”CQ de N1MM”></RCmd> Send cq on radio of the EW with focus
- Super Macro – I haven’t used this much, but looks like it has potential for more complex actions including displaying the clipboard, reading files, and updating button text.
Touch Portal
Stream Deck vs. Touch Portal: A Comparison
Both Stream Deck and Touch Portal (touch-portal.com) are tools designed to enhance workflows for streamers, content creators, and other professionals and both can be used with N1MM+. While they share similar functionality, they differ in form, cost, and user experience.
1. Hardware vs. Software
- Stream Deck:
- A physical device with tactile buttons. It is thus more suitable for local control of functions like function keys for messages.
- Each button is an LCD screen that can display customizable icons.
- Models with different button counts (Mini, Standard, XL).
- Requires a USB connection to a PC or Mac.
- Touch Portal:
- A software-based solution that turns a smartphone, tablet, or other touch devices into a customizable control panel.
- No physical buttons; it relies on a touchscreen interface.
- Available as an app for Android and iOS. This makes it much more portable than a Stream Deck, since you can operate it from your smartphone.
- Wi-Fi or USB connection is required for operation.
2. Cost
- Stream Deck:
- Higher upfront cost for the hardware.
- Prices vary based on the model (e.g., Mini is cheaper; XL is the most expensive).
- No ongoing subscription costs.
- Touch Portal:
- Significantly cheaper since it uses existing devices (smartphone or tablet).
- Free version available with limited features.
- Pro version (one-time purchase) unlocks advanced features, such as unlimited buttons and deeper integrations.
3. User Interface and Customization
- Stream Deck:
- Physical, tactile buttons provide navigation without looking.
- Buttons are backlit LCDs with dynamic, customizable icons.
- Supports folders and profiles for organizing commands.
- Touch Portal:
- Fully customizable touchscreen grid; the layout is limited only by the screen size.
- Custom buttons can include images, text, and animations.
- Offers flexibility in arranging buttons and adjusting layouts dynamically.
AutoHotKey – AHK
Description
(Consider using built in Key Mapping capability – Key Assignments – Key Mapping rather than AHK)
Autohotkey is extraordinarily powerful scripting and keyboard remapping freeware. You can remap keyboard, joystick, and mouse and run simple or very complex multi-step scripts. Virtually any key, button, or combination can become a hotkey.
AutoHotKey has no detectable performance impact on the operation of N1MM Logger+.
Once you have AutoHotkey installed, you create a script file in Notepad, name it with an .ahk extension, and double-click it. Windows knows that you want to run AHK, so an AHK logo for the script will appear in the system tray, and stay there until you actually exit from it. You can edit the script, read the help file, and reload the script from right-clicks on that logo. Each time you edit the script you need to reload it – also through the right-click on the logo.
Examples
Any of the following scripts can be copied verbatim and pasted into Notepad, then modified or saved with a new filename and an .ahk suffix.
AHK is a complex but powerful key mapping facility. N1MM+ has recently added KeyMapper capability that handles most users needs for mapping. Try it first before using AHK.
Text after a semicolon is comments, and is not executed. The symbol “^” denotes the [Ctrl] key, and “!” denotes the [Alt] key. When one of those symbols is combined with a key (such as ^i), the effect is to send Ctrl+i (i.e., both keys pressed simultaneously). See the AutoHotKey help file and tutorials for further details.
Simple key remapping
NumpadEnter::F10 ;Remap the number pad Enter key to F10
Using one key to send any multi-key combination
#UseHook
#SingleInstance force
#IfWinActive,,S&pot It ; makes script active only when N1MM Logger Entry window is active. This works because the word Spot occurs only in that window.
SetNumlockState, AlwaysOn
Numpad7::Send !{F9} ; Numeric key 7 – toggle antennas for a band
Numpad4::Send ^b ; Numeric key 4 – toggle dueling CQs
Numpad9::Send !r ; Numeric key 9 – toggle repeat CQs
Numpad5::Send ^{F1} ; Numeric key 5 – send CQ on radio that does not have entry focus
Numpad6::Send !w ; Numeric key 6 – wipe
Numpad0::Send {ESC}\“ ; Numeric key 0 – return from S&P to work station calling on run radio
Numpad1::Send \“; Numeric key 1 – go back to S&P on opposite radio
Using one key to send multiple keys at the same time
Numpad1:: ; Pressing number pad 1 invokes F5 and Pause
Send {F5}
Send {Pause}
return
Add more functionality to an existing key
$Pause:: ;Changes the Pause key to first do F5, then do the N1MM Pause key function. The $ keeps the script from calling itself.
Send {F5}
Send {Pause}
return
For SO2R, place a call in the inactive radio EntryWindow, emulating the TRLog Alt-D function
!d:: ;Alt-D
InputBox call
Send {\}
Send ^w
Sleep 200
Send %call%
Send {\}
return
Automate some of your hotkeys or other actions within the program
For example, to activate either EntryWindow, you can use these expressions:
WinActivate, ahk_exe N1MMLogger.net.exe, EntryWindow1
WinActivate, ahk_exe N1MMLogger.net.exe, EntryWindow2
Activate and set focus to N1MM+ if it is currently running
#UseHook
#SingleInstance force ; Force this script to replace the currently running script
SetTitleMatchMode, 2 ; Match on partial text like VFO and EntryWindow below
#IfWinExist VFO ,EntryWindow ; Is N1MM+ running?
{
#WinActivateForce
ScrollLock::
WinActivate , ahk_exe N1MMRotor.Net.exe
WinRestore, ahk_exe N1MMLogger.Net.exe
WinActivate , ahk_exe N1MMLogger.Net.exe
winset, Top , , ahk_exe N1MMLogger.Net.exe
winset, Bottom , , ahk_exe N1MMLogger.Net.exe, EntryWindow1
winset, Top , , ahk_exe N1MMLogger.Net.exe, EntryWindow1
WinActivate , ahk_exe N1MMLogger.Net.exe
WinActivate , ahk_exe N1MMLogger.Net.exe, EntryWindow1
return
}
ScrollLock::WinActivate ; Yes. Activate the last used Entry Window
Set the numeric pad 8 & 2 keys to jump multipliers in the bandmap (normally a 3-finger combination)
#SingleInstance force ; Force this script to replace the last one, not append
SetNumlockState, AlwaysOn
#ifWinActive,,S&pot It ; Look for the spot button on the entry window to see if entry window has focus
Numpad8::sendinput, !^{up}
Numpad2::sendinput, !^{down}
Using single keys to grab multipliers on VFO A and B
#UseHook
#SingleInstance force
#IfWinActive,,S&pot It ; makes script active only when N1MM Logger Entry window is active. This works because the word Spot occurs only in that window.
SetNumlockState, AlwaysOn
Numpad7::Send ^!{Up} ; Numeric key 7 – VFO A Go to next multiplier up the bandmap
Numpad1::Send ^!{Down} ; Numeric key 1 – VFO A Go to next multiplier down the bandmap
Numpad9::Send ^!{Up} ; Numeric key 9 – VFO B Go to next multiplier up the bandmap
Numpad3::Send ^!{Down} ; Numeric key 3 – VFO B Go to next multiplier down the bandmap
Press a Bandmap Button via Numeric Keyboard (good for additional cw messages)
#UseHook
#SingleInstance force
#IfWinActive,,S&pot It ; makes script active only when N1MM Logger Entry window is active. This works because the word Spot occurs only in that window.
SetNumlockState, AlwaysOn
NumPad0::Send ^+!0
NumPad1::Send ^+!1
NumPad2::Send ^+!2
NumPad3::Send ^+!3
NumPad4::Send ^+!4
NumPad5::Send ^+!5
NumPad6::Send ^+!6
NumPad7::Send ^+!7
NumPad8::Send ^+!8
NumPad9::Send ^+!9
Send a canned CW message from a non-Fkey
#UseHook
#SingleInstance force
#IfWinActive,,S&pot It ; makes script active only when N1MM Logger Entry window is active. This works because the word Spot occurs only in that window.
SetNumlockState, AlwaysOn
Numpad1::Send ^k testing?^k ; Send a CW message from a designated hotkey (Numeric key 1 in the example).You’ll see the Ctrl+K keyboard window appear and quickly disappear, but the CW continues to be sent until it is done (unless you hit ESC to interrupt it)
Tune your radio’s VFO with the mouse wheel
Script written by K8UT, with revisions by KU1T
;next two lines are for testing the definition. uncomment them to make them work
;WheelDown::MsgBox You turned the wheel DOWN
;WheelUP::MsgBox You turned the wheel UP
;This script works, but you lose the Bandmap zoom mouse wheel feature. Use the keypad + and – keys instead
#UseHook
#SingleInstance force
#IfWinActive,,S&pot It ; makes script active only when N1MM Logger Entry window is active. This works because the word Spot occurs only in that window.
SetNumlockState, AlwaysOn
Numpad9::Send {Up} ; Numeric key 9 – toggle repeat CQs
;— x10 large frequency shift – hold down Left Shift, numeric pad 9 = 10 keypresses
LShift & Numpad9::Send {Up}{Up}{Up}{Up}{Up}{Up}{Up}{Up}{Up}{Up}
Numpad6::Send !w ; Numeric key 6 – wipe
Numpad3::Send {Down} ;
;— x10 large frequency shift – hold down Left Shift button, Numeric pad 3 = 10 keypresses
LShift & Numpad3:: Send {Down}{Down}{Down}{Down}{Down}{Down}{Down}{Down}{Down}
;and finally wheel works
WheelUp::Send {Up} ; spin wheel forward, frequency moves UP
WheelDown::Send {Down} ; spin wheel backward, frequency moves DOWN
;— x10 large frequency shift – hold Left SHift button, spin wheel = 10 keypresses
LShift & WheelUp::Send {Up}{Up}{Up}{Up}{Up}{Up}{Up}{Up}{Up}{Up} ;
LShift & WheelDown:: Send {Down}{Down}{Down}{Down}{Down}{Down}{Down}{Down}{Down} ;
Use extra mouse buttons for common keystrokes
; Special keys using the Microsoft model 1007 mouse which has two additional aux buttons
; Send N1MM common keystrokes from the mouse
; Facilitates RTTY operation entirely from the mouse
MButton:: Send {Enter} ; press wheel sends [Enter] for ESM
XButton1:: Send {Enter} ; press wheel sends [Enter] for ESM
XButton2:: Send {Esc} ; aux mouse button2 sends [Escape]
Return
PowerToys
PowerToys from Microsoft has some of the features of AHK, but is easier to set up, but less capable. If you have simple keystroke mapping requirements, this might be a better solution. It is able to restrict its mapping to a single program. For use with N1MM+, specify N1MMLogger.net.exe as the application.
Download at: https://learn.microsoft.com/en-us/windows/powertoys/install
(Consider using built in Key Mapping capability – Key Assignments – Key Mapping rather than PowerToys)
CC User (formerly AR Cluster User)
CC User by Lee, VE7CC is a full featured Telnet and TNC program for use with AR Cluster, CC cluster or DX Spider Nodes.
It has telnet and RS-232 outputs for logging and contest programs like N1MM logger. Runs under Windows 95 to Windows 8 and can auto reconnect and automatically gets missed spots. It can be used with telnet and TNC’s.
The program can receive spots both in connected and unconnected modes, this means it also recognizes spots when NOT connected to any packet node, just monitoring the RF channel where other users are receiving spots is good enough.
CC User greatly simplifies the process of setting up spot filters at the cluster node.
Setting up CC User with N1MM logger
- Settings CC User
- Connect to your packet node with CC User
- Go to Configuration – Ports/Logger Program
- Check “Telnet” Logging Program Connection, Apply for both the Node Connection and the Logging Program Connection
- Open N1MM Logger
- Open the Telnet window, click on the Clusters tab and look at the pulldown list of cluster nodes for CC User, (or LocalHost or 127.0.0.1)
- If there isn’t already an entry, add CC User
- Use 127.0.0.1:7300 if CC User and N1MM are on the same computer
- Check the CC User website for instructions on using multiple computers
- Connect to CC User from the Telnet window
- Open the Telnet window, click on the Clusters tab and look at the pulldown list of cluster nodes for CC User, (or LocalHost or 127.0.0.1)
- You should see spots flow into N1MM Logger from CC User
Check out the the CC User website.
2Tone (by David, G3YYD)
2Tone is a drop-in replacement for MMTTY using different decoding and encoding algorithms. It can be used in any of the Digital Interface or Additional RX digital windows in N1MM Logger+ in place of MMTTY. Many users have found that it decodes more accurately than MMTTY under difficult conditions.
To obtain a copy, you must join the N1MMLoggerplus user group at groups.io . Go to the groups.io web page for the group, select the Files page, find the folder named “G3YYD”, and look in that folder for the latest version. Download the zip file containing the most recent version and unzip it into a suitable folder (NOT within the C:\Program Files or C:\Program Files (x86) paths). Read the 2Tone documentation that is included in the zip file for installation and operating instructions. Note that when configuring any of N1MM Logger+’s digital windows to use 2Tone, you set up the window as if you were using MMTTY, except that the fully qualified filename in the setup ends with “2Tone.exe” instead of “MMTTY.exe”. For more detailed information see the Downloading and Installing 2Tone section in the Digital Setup chapter of the manual.
2Tone offers four different decoders for different propagation conditions. By far the two most commonly used ones are Selective and Flutter. The best way to use 2Tone is with two copies of 2Tone (in different folders) open at the same time with one set for Selective and the other set for Flutter.
In transmit 2Tone must be used in the main DI window and can be set for AFSK, DOOK (a narrower and slightly higher performing version of AFSK), pseudo FSK requiring special hardware, TinyFSK using an Arduino via a COM port, or FSK via a COM port RTS, DTR or TxD line. In the AFSK/DOOK modes the left or right stereo output of the sound card can be used so SO2R can be used with one stereo sound card, with 2Tone on DI1 set up to use the left channel and another copy of 2Tone on DI2 set up to use the right channel of the sound card.
Notifications of 2Tone updates are sent out on the N1MMLoggerplus groups.io user group.
QSOrder (by Vasily, K3IT)
QSOrder is a QSO recording program written by Vasily, K3IT, to enable N1MM Logger users to record contest QSOs on the fly and replay them. QSOs are stored individually in folders labelled with the contest name.
Download QSOrder as a zip file from the QSOrder project area at GitHub. Create a folder in which you will store the contest recording folders (e.g. a Contest Recordings folder within your N1MM Logger+ user files folder) and unzip the contents of the zip file into that folder.
QSOrder uses N1MM Logger’s UDP broadcasts. Follow the instructions in the downloaded readme.txt file to use the Configurer, Broadcast Data tab to include broadcasts of contact information from N1MM Logger to QSOrder. Note that the default port in the instructions is 12060. If you use other plugins that rely on UDP broadcasts from N1MM Logger, you may need to change the port number used by QSOrder in order to avoid conflicts. If you wish to use a different port number, change the port number used for contact broadcasts in Configurer, Broadcast Data tab, “Contacts” and use QSOrder’s PORT command-line flag to tell it to use the port number you have chosen (e.g. -P 12061).
To use QSOrder for a particular contest, start the QSOrder program and run it at the same time as N1MM Logger. Each time a QSO is logged in the Logger, a UDP broadcast will trigger QSOrder to save a recording of that QSO. Recordings are saved in a sub-folder named by contest-name and year, and each QSO is saved in a file whose name includes the callsign of the station worked, the name of the contest, the date, time and band. The length of each recording is determined by the buffer length option, and the recordings are set to run until a specified delay time after the contact is logged; both of these time parameters are configurable using command-line flags. To use one of these command-line flags, insert it into the Target: line in the desktop shortcut you use to start QSOrder with, e.g. Target: “C:\Users\User\Documents\N1MM Logger+\QSOrecording\QSOrder.exe” “-P 12061” (the program name and each command-line flag should be enclosed in a separate set of quotation marks).
Athena Log Analyzer by PC5M (SK)
Athena is a very powerful analysis tool which integrates a N1MM+ log to show graphically contest data in real-time. Either individual bands, or an all-band total can be displayed. Selection can be made to show QSO’s, Multipliers, Points or Multi*Points.
Existing contest logs may be used to produce “goal files” which can be compared against live progress. Athena can automatically adjust the time and date before creating these files to match the current contest timing.
Athena V1.2.0.0 supports N1MM+ logs
Athena archive kindly hosted by Anthony Luscre K8ZT http://www.k8zt.com/contesting
Posting courtesy Stewart G3RXQ
Real-time Log Backup – TRNMirror (by Larry, K8UT)
TRN_Mirror monitors the N1MM Logger transaction log files and maintains a shadow copy of your contest log in a second location.
Updated: v1.3 2018-07-01
Features
- Provides a log recovery mechanism in the event of a hard drive or computer crash
- Automatically tracks new transaction files from new logs and new contests
- Creates mirror files on a second hard drive in the PC, a USB thumbdrive, a networked drive, or cloud storage
- Copies the N1MM Logger TRN file based on events (when the TRN file changed) or time (after n minutes since last copy)
- Avoids any file access errors that can occur when accessing the live contest database
- Efficiently makes a mirror file only when the TRN file has changed
- Creates n versions of the transaction file, based on configuration settings
- Renames the mirror files using version numbers (filename(1).trn, filename(2).trn, filename(3).trn…)
- Stores latest settings and mirror version counts in INI files
Documentation and download instructions: https://www.k8ut.com/file-gallery/programs
Multiplier Map Display – Mult Chaser (by Patrick, NA0N)
Mult Chaser is a free add-on program for N1MM Logger that displays contest multipliers on a map of North America as they are worked. The program reads from the specified N1MM Logger database after each contact, provided that Mult Chaser and N1MM Logger are both configured appropriately. Mult Chaser supports contests with ARRL/RAC sections as multipliers (Sweepstakes, Field Day, ARRL 160), contests with states/provinces as multipliers (NAQP, ARRL RTTY), contests with grid squares as multipliers (Stew Perry), and US State QSO parties.
Documentation: https://sites.google.com/site/korkowp1/mult-chaser-help
Downloads: https://sites.google.com/site/korkowp1/mult-chaser-downloads
R8 Brain – Audio File Resampler
Sample rate and bit resolution converter for audio recording .wav files.
It includes a batch mode to modify all .wav files.
Download: https://www.voxengo.com/product/r8brain

